The My Courses module provides enhanced control over how courses are displayed and grouped in Blackboard. Users will now have the ability to decide what terms are displayed and in what order as well as having the ability to choose which courses are displayed and/or hidden.
To Expand/Collapse a Term:
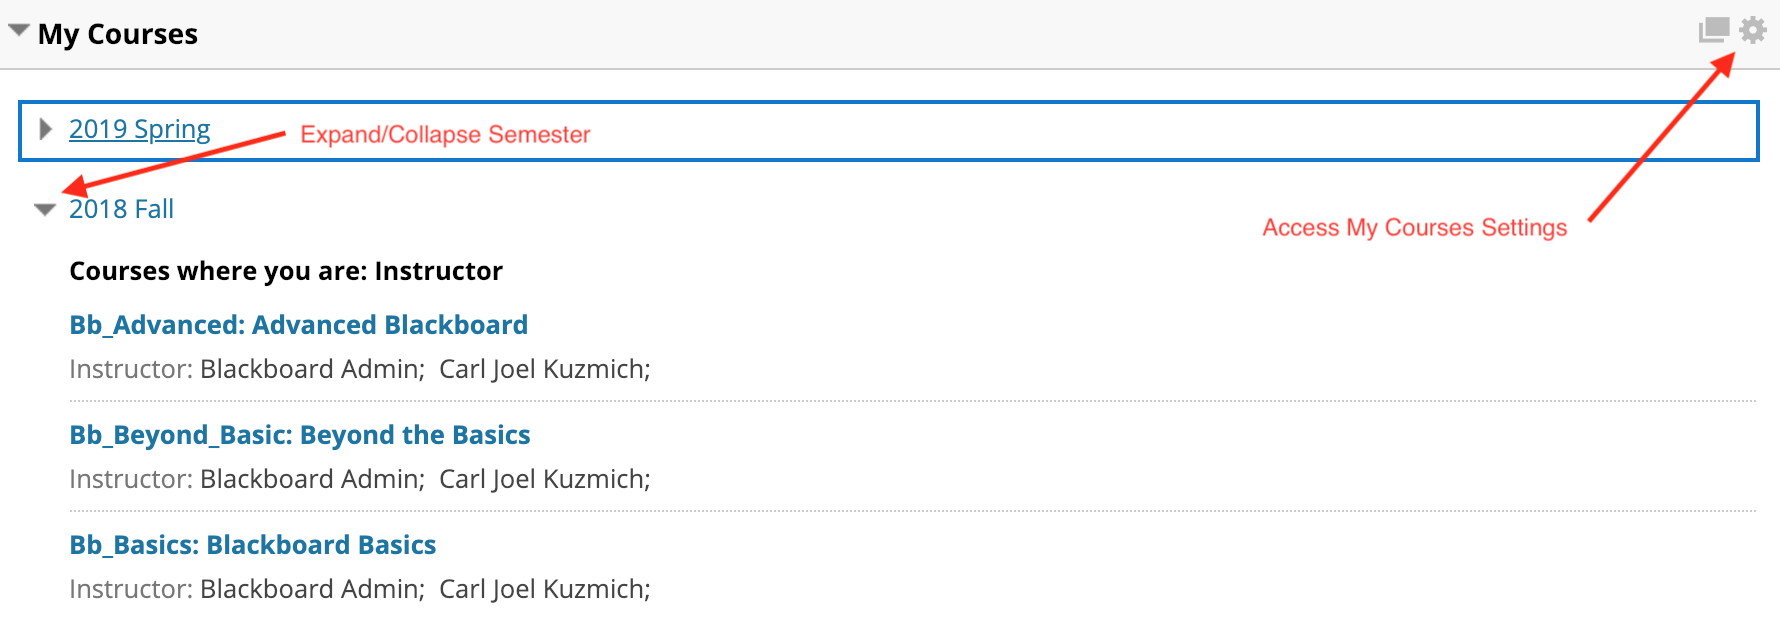
To Expand or Collapse a term, simply click the term name or small arrow to the left of the term, see below:
To Hide/Unhide a Term:
- Click the gear icon in the upper right corner of the My Courses module.
- On the next page, under the Terms header, check the boxes under Show Term for all terms you wish to display (uncheck the box if you want to hide the term).
- Click the Submit button.
The term(s) should no longer be visible in the My Courses module.
To Rearrange Term Order:
- Click the gear icon in the upper right corner of the My Courses module.
- On the next page, under the Terms header, move terms into the desired position by clicking and dragging on the double-headed arrows to the left of the terms.
- When the terms are in the desired order, click the Submit button.
The terms should now be in the desired order in the My Courses module.
To hide/unhide a Course and it’s associated information:
- Click the gear icon in the upper right corner of the My Courses module.
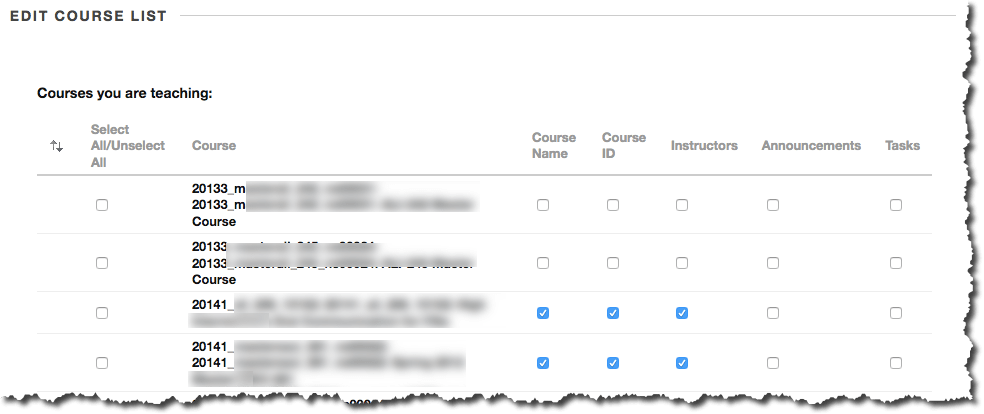
- On the next page, under the Edit Course List header, check the boxes for the courses and it’s related information that you wish to be displayed (uncheck the box if you want to hide the course or course information).
- Click the Submit button.
The course(s) should no longer be visible in the My Courses module.
To Rearrange Course Order:
- Click the gear icon in the upper right corner of the My Courses module.
- On the next page, under the Edit Course List header, move courses into the desired position by clicking and dragging on the double-headed arrows to the left of the courses.
- When the courses are in the desired order, click the Submit button.
The courses should now be in the desired order in the My Courses module.
Instructions for USC Instructors
The simplest way to allow students access to a course is to use Qwickly. Otherwise, to make a course available to enrolled students, follow these steps:
- Click on the name of the course in the My Courses module to enter the course, then scroll down, and
- Under Course Management, click Customization.
- Click Properties.
- Click Yes next to Make Course Available.
- Click Submit.
Instructions for USC Teaching Assistants
The simplest way to allow students access to a course is to use Qwickly. Otherwise, to make a course available to enrolled students, follow these steps:
- Click on the name of the course in the “My Courses” module to enter the course, then scroll down, and
- Under Course Management, click Customization.
- Click Properties.
- Click Yes next to Make Course Available.
- Click Submit.
Enrolled students will now see the course listed when logged into Blackboard.
About Course Availability
ITS automatically creates a Blackboard course for every course that is listed in the Schedule of Classes that has an instructor or TA assigned. All Blackboard courses are automatically hidden (unavailable) from students.
ITS also disables student access to completed Blackboard courses approximately eight weeks after the last day of classes, as listed on USC’s academic calendar .
- Student access to summer semester courses ends on or around October 1.
- Student access to fall semester courses ends on or around February 1.
- Student access to spring semester courses ends on or around July 1.
If students would like to see their final course grades for previous semesters, they can view their official grade reports on
OASIS or MyUSC.