Creating a Group (Movie 03:09)
Creating Single Groups
- On the Control Panel, under Users and Groups, select Groups. Alternatively, you can use the Groups Page link on the Course Menu, if you have made it available.
- On the Groups page, click Create Single Group on the Action Bar to access the drop-down list.
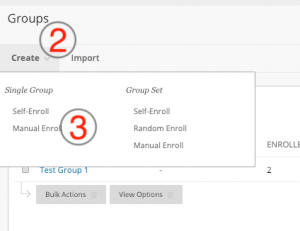

- Select Manual Enroll.
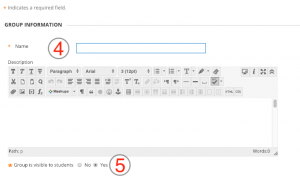
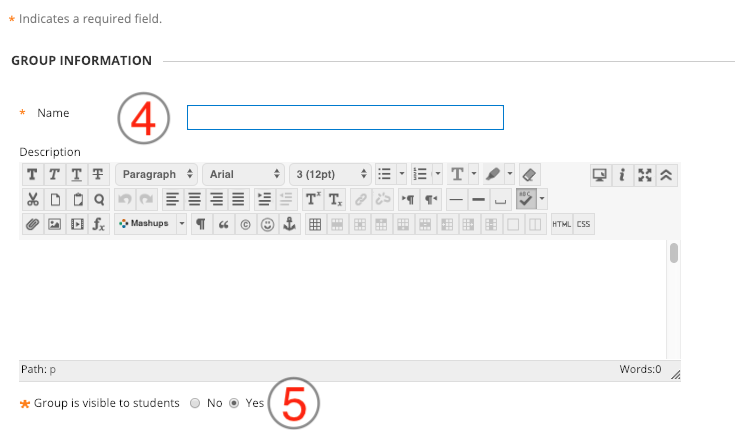
- On the Create Group page, enter a Name and optional Description.
- To make the Group Available, select the Yes radio node.
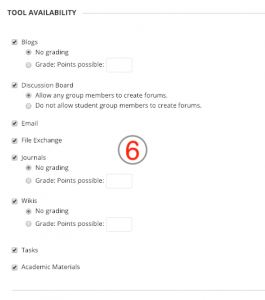
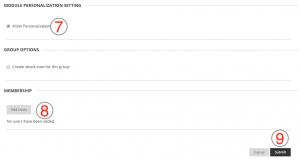
- Next, select the tools you want this group to have at their disposal.

- Select the checkbox for Module Personalization Setting to allow students to add personal modules to the “Group Homepage.”
- Select members in the Items to Select box and click the right-pointing arrow to add the highlighted names to the Selected Items box.
- Click Submit.

When “Allow Personalization” is selected, a student may add personal modules to the “Group Homepage,” such as What’s New, My Calendar, and Needs Attention. Only the person who added the modules can view them. The learner’s are not changing any decisions you made about the group.
Select multiple members at one time by holding down the CTRL key while clicking the names to enroll.
Take Note
- On the Groups listing page, select the Group to view. Alternatively, click the Group’s Action Link and select Open.
- Click the Group name’s Action Link and select Edit to change the Group name, description, availability, settings, or membership.
- Click Add Course Module on the Action Bar to add a module to the Group Homepage, such as My Calendar. Remove modules using the Delete function in the module’s title bar. Click Add Group Module on the Action Bar to add a Group module, if you previously deleted one. All Group Modules appear by default.
- View information about the Group in the Group Properties module. Collapse or Delete the module using the functions in the module’s title bar.
- Select a Group tool to use.
- Click Customize Page on the Action Bar to change the color palette for the Group. The color palette choice is seen by all the members of the Group, but does not affect colors in the rest of the course.
- Click the Keyboard Accessible Reordering tool on the Action Bar to reorder the modules or use the drag-and-drop operation: press and hold the module’s title bar, move it to a new location, and release. The modules can be rearranged in a two column layout. The second column is currently empty in our example.