Assignments are created in Content Areas, but can also be added to Learning Modules, Lesson Plans, and folders. Any instructions and file attachments that students need to complete the assignment are provided at the time of creation. You can deliver assignments to each student individually or as collaborative work for groups of students.
As assignments are created, you will work in Edit Mode ON. Edit Mode ON allows you to view all of the instructor functions.
The easiest way to collect assignments, papers, or files from your students is to create an Assignment in Blackboard.
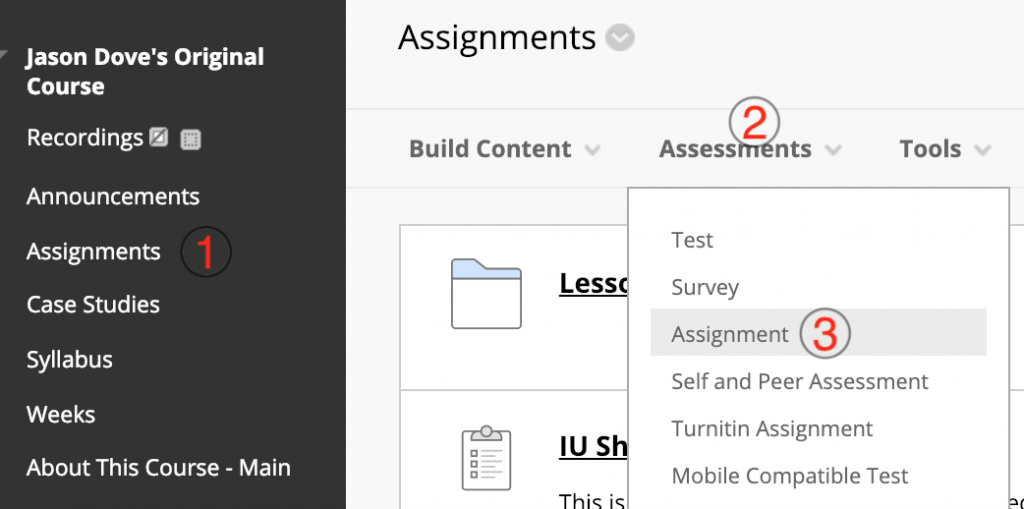
- In Edit Mode ON click the Assignments link on your course’s homepage.
- Click on Assessments.
- On the drop-down list, click Assignment.
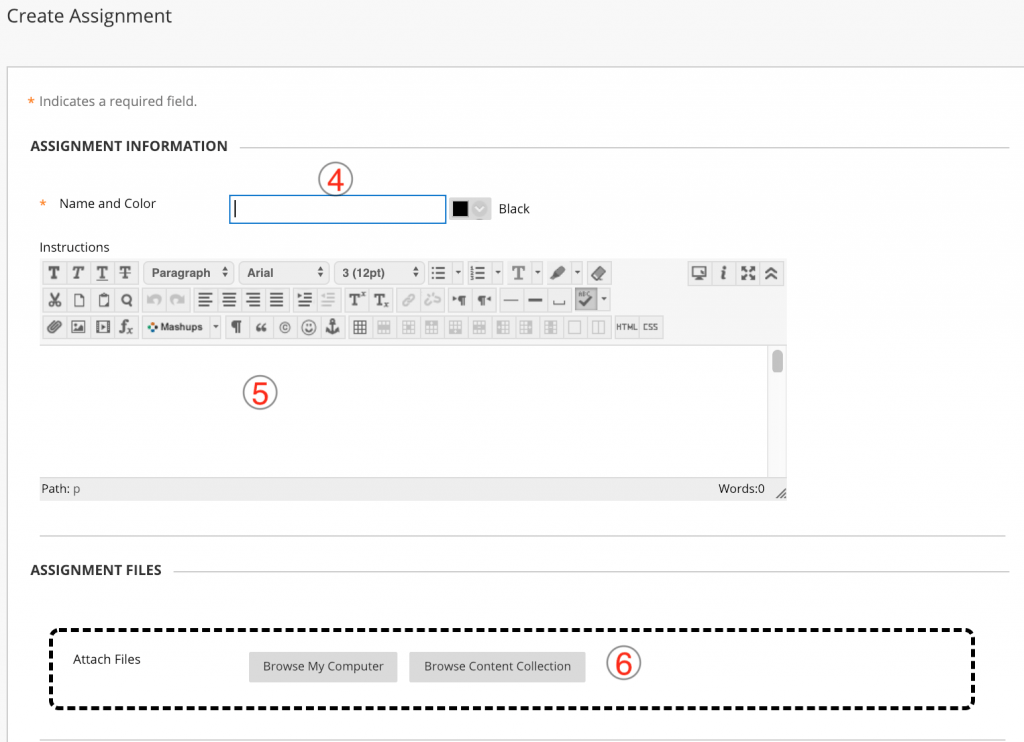
- On the Create Assignment page, enter a Name for your assignment. This is required.
- In the Instructions box, add the instructions for the assignment–if desired. This is optional.
- You can also browse and attach a file from your local computer if you wish. While this is completely optional, some instructors attach a journal article to their assignments, others attach an exemplar of what an exceptional student submission should look like. Again, this is optional. But, this process is similar to the process of attaching a file to an email message.
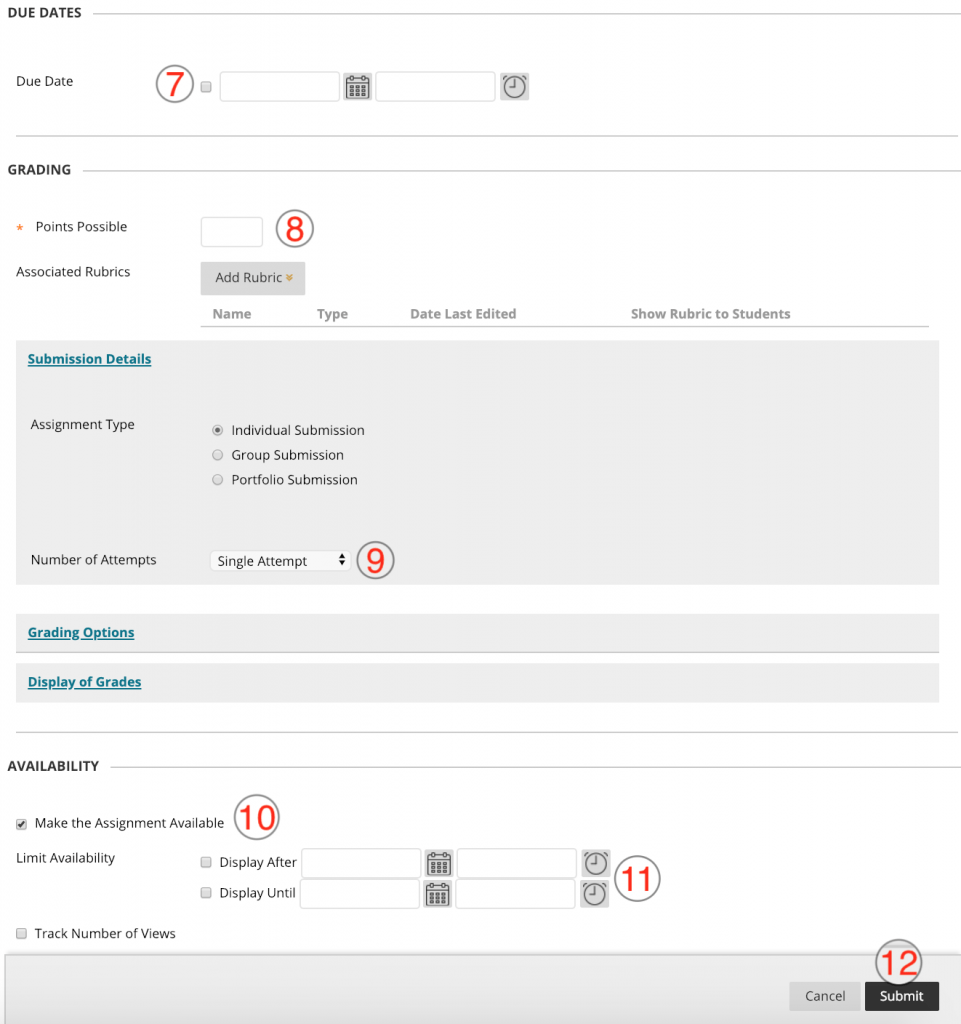
- If you are going to accept late submissions, select and set the Due Date and time. If you are not going to accept late submissions, leave this section blank.
- Scroll down and enter the Points Possible.
- For Number of Attempts, we strongly recommend that you either allow unlimited attempts or allow a certain number of attempts rather than allowing just a single attempt. Experience shows that at least one of your students will accidentally submit the wrong file or accidentally submit an assignment with no file attached. If you set Number of Attempts to Allow Single attempt, that student will be locked out of the assignment and you will need to manually clear his or her assignment attempt in your Grade Center before the student will be able to submit the correct file. However, choosing to allow 2 attempts gives your students one “do-over” if they need it and it and won’t impact your grading at all because, by default, Blackboard shows you the student’s most recent submission (although there is an option to view and download a student’s previous submissions.)
- Select the checkbox to Make the Assignment Available. This makes your Assignment available to students, although you can choose the date and time that students can see or not see this Assignment under Limit Availability.
- Select and set Display After for the date and time you will start accepting student submissions and select and set Display Until for the date and time the assignment is due. This prevents students from submitting assignments after the deadline.
- Then, click Submit.


Blackboard will display a green success box telling you that you assignment has been successfully created. To see what your assignment looks like from a student’s point of view, turn Edit Mode off.