No purely online assessment system can prevent all forms of cheating. Unless you are giving the test as a proctored computer lab test, you should consider Blackboard assessments tantamount to a take-home exam. If you are not comfortable with take-home exams, you should not be using Blackboard for assessments.
Topic: Using the Tests Tool
No purely online assessment system can prevent all forms of cheating. Unless you are giving the test as a proctored computer lab test, you should consider Blackboard assessments tantamount to a take-home exam. If you are not comfortable with take-home exams, you should not be using Blackboard for assessments.
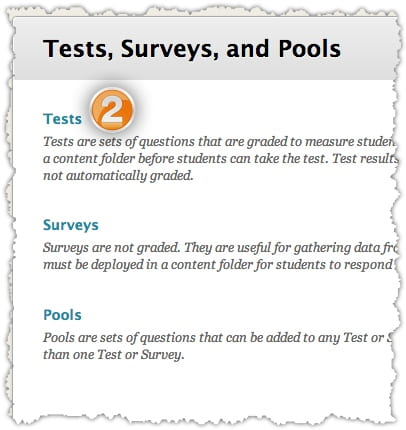
- On the Control Panel, under Course Tools, click Tests, Surveys, and Pools.
- On the Tests, Surveys, and Pools page, click Tests.
The Tests page displays any existing tests and allows you to build new tests.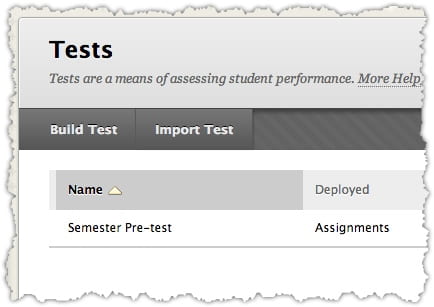
Topic: Adding a Test
No purely online assessment system can prevent all forms of cheating. Unless you are giving the test as a proctored computer lab test, you should consider Blackboard assessments tantamount to a take-home exam. If you are not comfortable with take-home exams, you should not be using Blackboard for assessments.
- On the Tests page, click Build Test.
- On the Test Information page, enter a Name, Description, and Instructions.
- Click Submit.
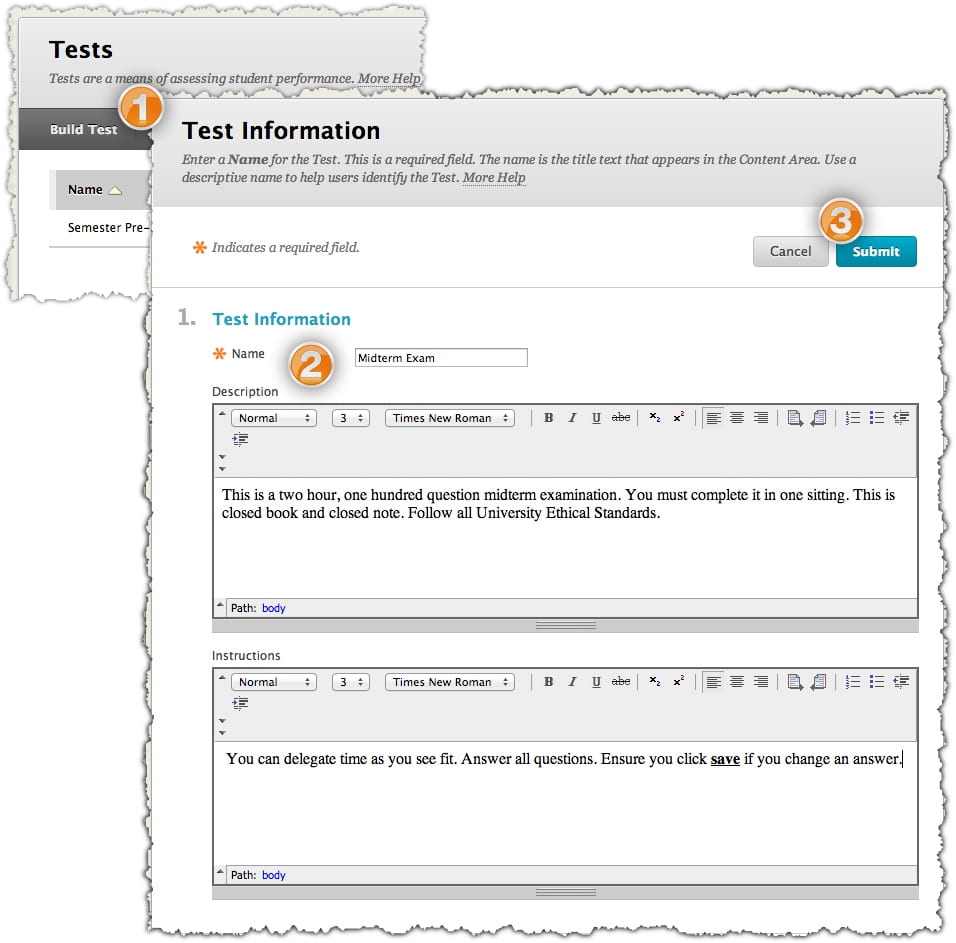
NOTE: A description and instructions are optional, but recommended.
Topic: Specifying Test Creation Settings
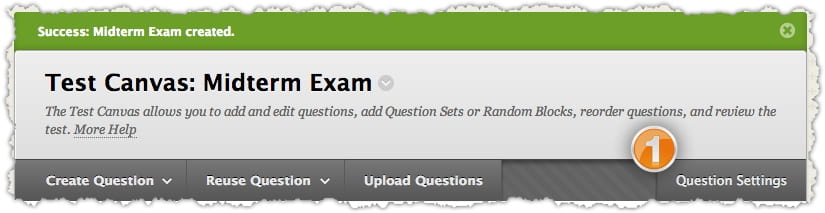
After entering the test information, the Test Canvas page appears, displaying the test name, description, and instructions. The next step in the test creation process is selecting the Creation Settings.
- On the Test Canvas page, click Creation Settings on the Action Bar.
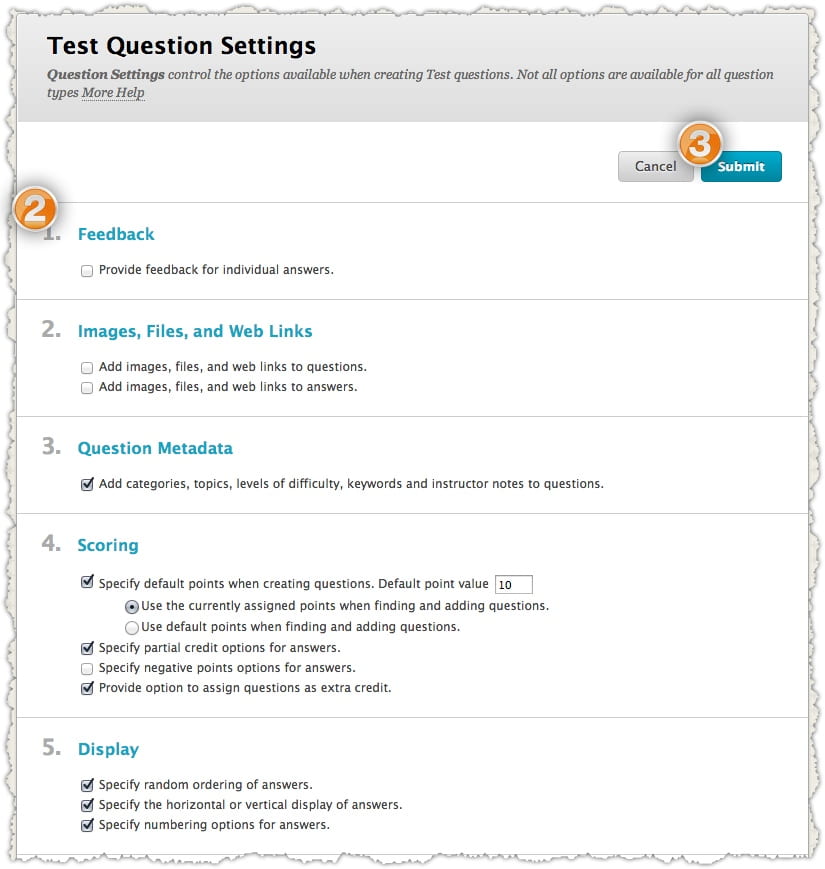
- On the Test Question Settings page, select the desired options.
- Click Submit.
| Question Type | Description |
| True/False | Students select the validity of a statement. |
| Multiple Choice | Students select the single correct answer from a series of answers. |
| Multiple Answer | Students select one or more correct answers from a series of answers. |
| Ordering | Students are presented with a list of items to place in order according to criteria specified in the question. |
| Matching | Students are presented with two lists of items and must pair items from one list with the other list. |
| Fill in the Blank | Students type text or numbers to complete a statement. |
| Essay | Students write a detailed response to a question or statement. |
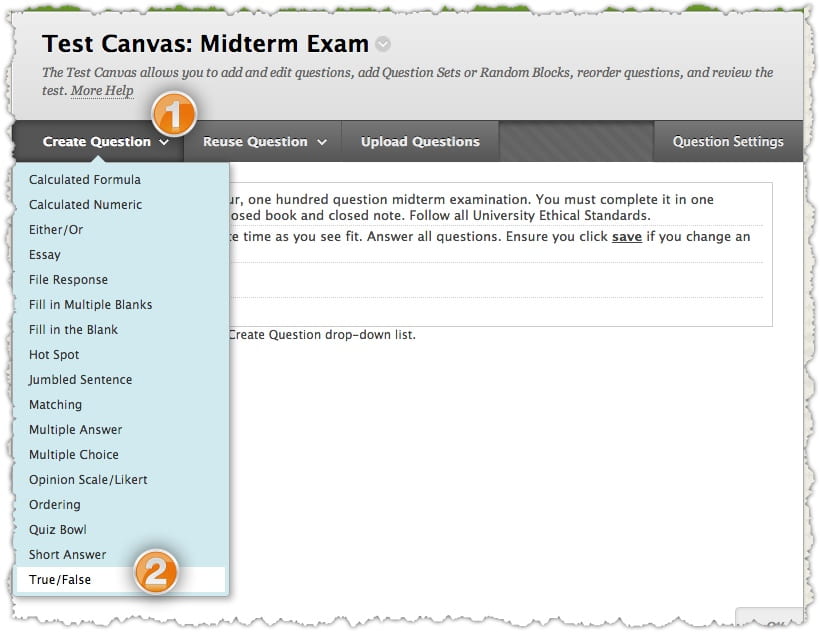
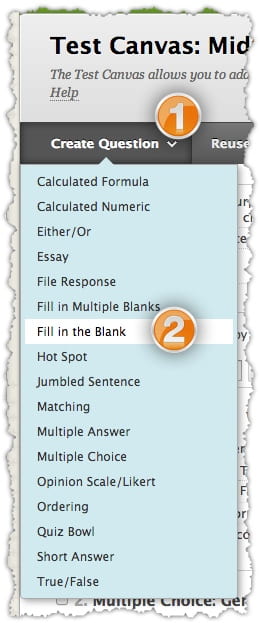
The process for adding questions to tests is similar for each question type. All question types are chosen on the Test Canvas page using the Create Question drop-down list on the Action Bar. The question types are listed in alphabetical order. We will create a True/False question from start to finish.
Topic: Creating True/False Questions
- On the Create Question drop-down list, select True/False.
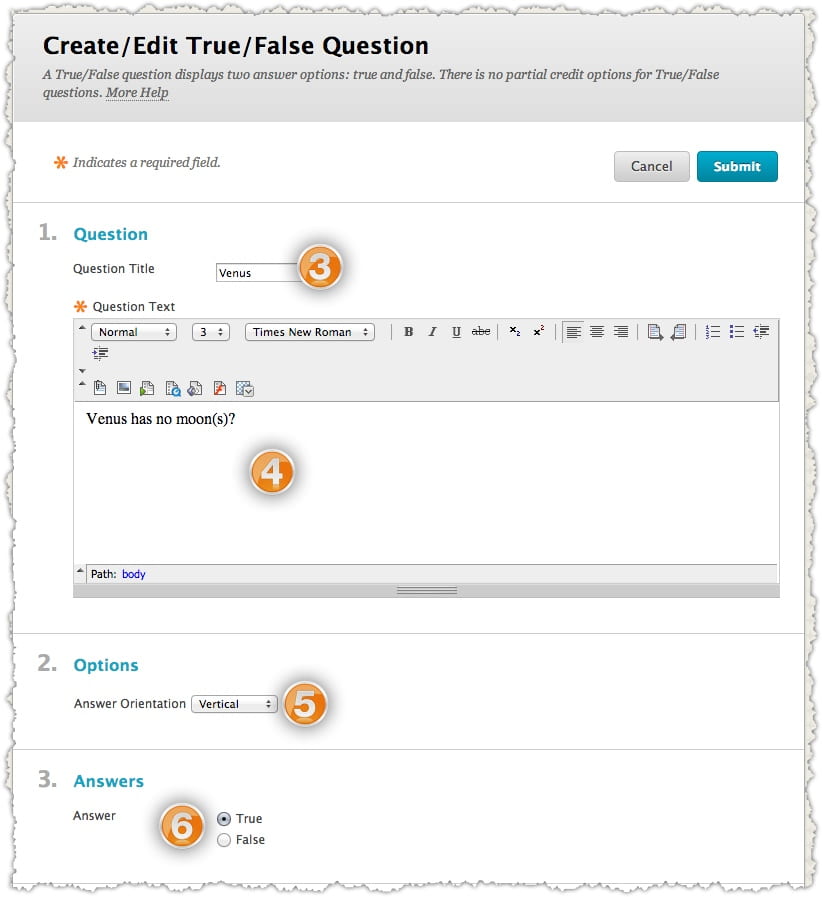
- On the Create/Edit True/False Question page, enter the Question Text. Format the question with the Text Editor, if desired.
- Give the question a title.
- Enter the actual question into the “Question Text” box.
- Choose whether you would like the question to be vertical or horizontal.
- Choose the correct answer for the T/F question.
- Enter feedback to be displayed if the student gets the question correct.
- Enter feedback to be displayed if the student gets the question incorrect.
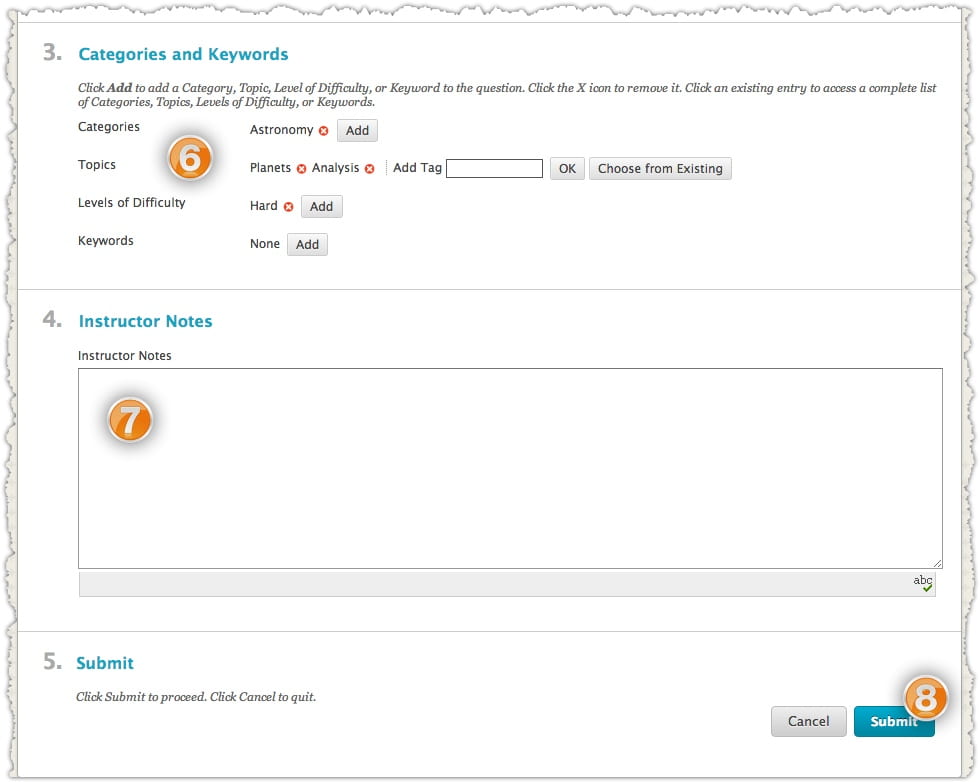
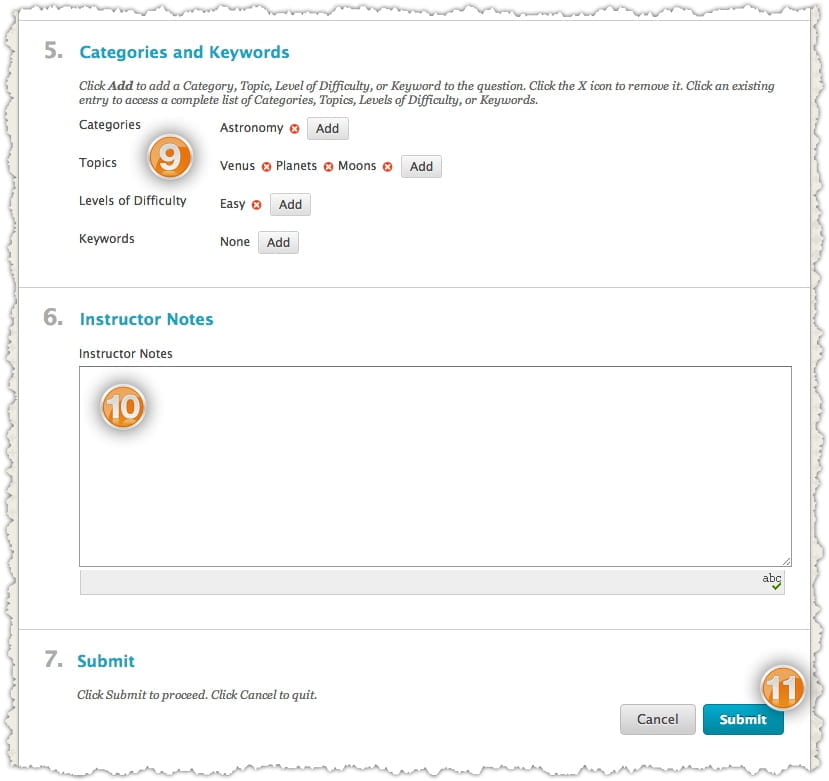
- You can choose to give the question a category, topics, a difficulty, and keywords for sorting later.
- You can leave notes for yourself.
- Click submit.
Topic: Creating Multiple Choice Questions
- On the Create Question drop-down list, select Multiple Choice.
- On the Create/Edit Multiple Choice Question page, enter the Question Text and title. Format the question with the Text Editor, if desired.
- Select Options, such as how answers are numbered, orientation, and partial credit, if desired.
- Select Number of Answers from the drop-down list.
- Enter answers in the Answer text boxes.
- Select the radio node for the Correct answer.Optionally, enter Feedback for correct and incorrect answers.
- You can choose to give the question a category, topics, a difficulty, and keywords for sorting later.
- You can also leave instructor notes for yourself for later.
- Click Submit.
NOTE: Any answer box may be deleted by clicking Remove to the right of the box.
If Provide Feedback for Individual Answers was selected when the test’s Question Settings were made, custom feedback can be entered for each answer.
Topic: Creating Ordering Questions
- Click “Create Question”
- Select Ordering. Format the question with the Text Editor, if desired.
- Enter the title of the question.
- Enter the question the students will be answering.
- Select the form of numbering/lettering for the question. This is purely cosmetic.
- Select whether or not you wish to allow partial credit.
- Select Number of Answers from the drop-down list.
- Enter the correct answers in no particular order.
- Click next.Each answer has a double-tipped arrow, or handle, that is used to move the answer into the correct order using the drag-and-drop function. The answer is surrounded by dashes as it being moved. Arrange answers using the drag-and-drop function or the Keyboard Accessible Reordering Tool.
- Use the drag-and-drop function to arrange the display order for the answers. Alternatively, use the Keyboard Accessible Reordering Tool to arrange the answers.
- Optionally, enter Feedback for correct and incorrect answers.
- You can choose to give the question a category, topics, a difficulty, and keywords for sorting later.
- You can leave Instructor’s notes for yourself.
- Click submit.
Topic: Creating Matching Questions
- Click “Create Question”
- Select “Matching”
- Enter the Question Title.
- Enter the Question Text into the text editor.
- Under Options, choose whether you would like to allow partial credit and the numbering type. This type is cosmetic only.
- Select Number of Questions from the drop-down list.
- Enter questions and corresponding answers in the following boxes.
- Optional: If you have partial credit enabled you can edit the percentages here. This should only be changed if you want some incorrect answers to award more credit than others. For example: If I asked which of the following was one of King Henry VIII’s wife and Natalie Portman was an answer, I would want to award the no partial credit. Once partial credit is divided as you would like ti to be, scroll back up to heading “3. Questions” and press the “Update Partial Credit %” button.
- You can choose to add unmatched answer choices to make this a more difficult question.
- Choose whether you would like to manually edit the ordering or have it done randomly.
- You can choose to leave feedback for correct or incorrect answers.
- You can choose to give the question a category, topics, a difficulty, and keywords for sorting later.
- You can leave instructor notes for yourself.
- Click Submit.
Topic: Creating Fill in the Blank Questions
- Click “Create Question”
- Click “Fill in the Blank”
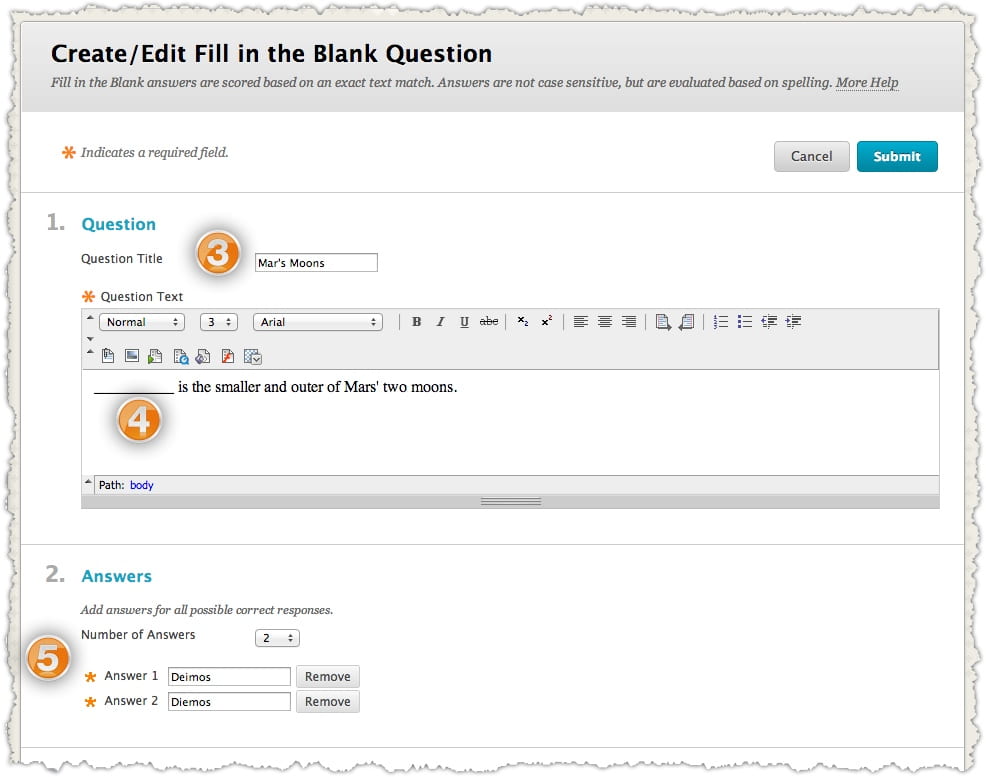
- Enter a Question Title.
- Enter the Question Text.
- Enter possible answers in the Answer text boxes. You may have up to 20 variations.
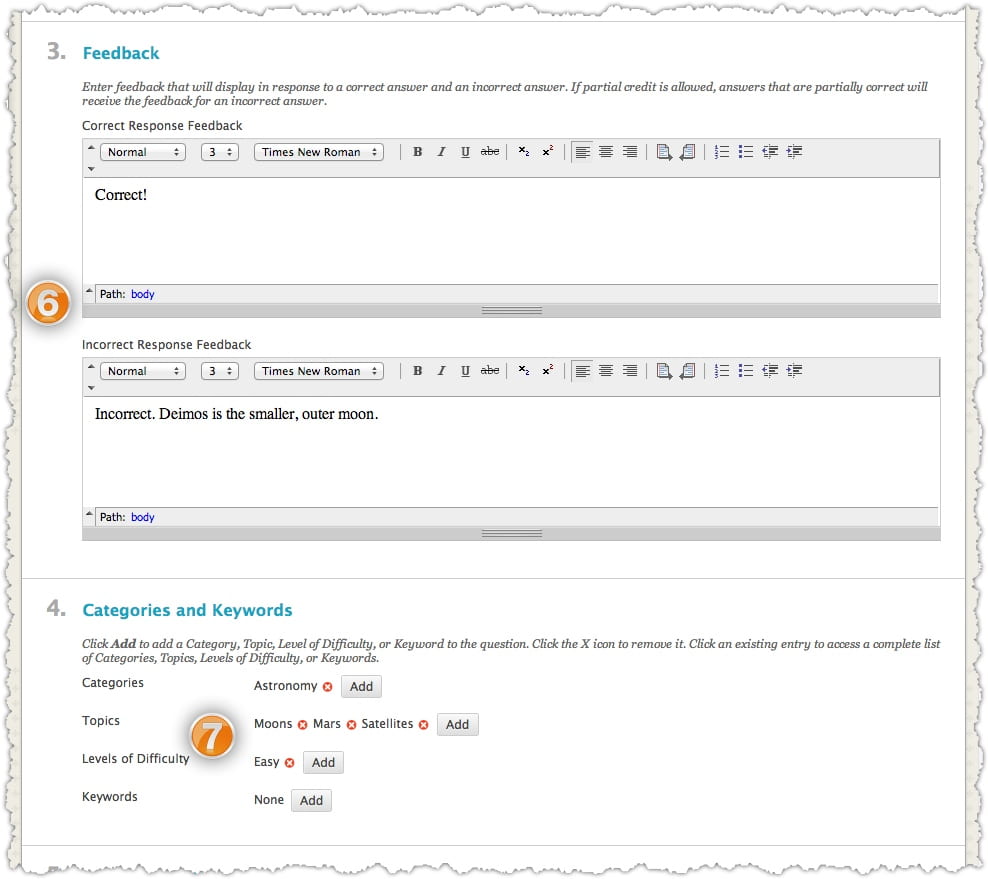
- Optionally, enter Feedback for correct and incorrect answers.
- You can choose to give the question a category, topics, a difficulty, and keywords for sorting later.
- You can leave instructor notes for yourself for later.
- Click Submit.
Topic: Creating Essay Questions
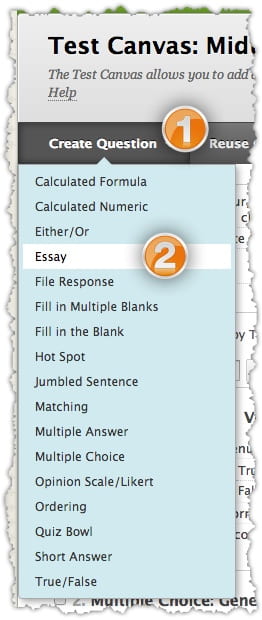
- Click “Create Question”
- Click “Essay”
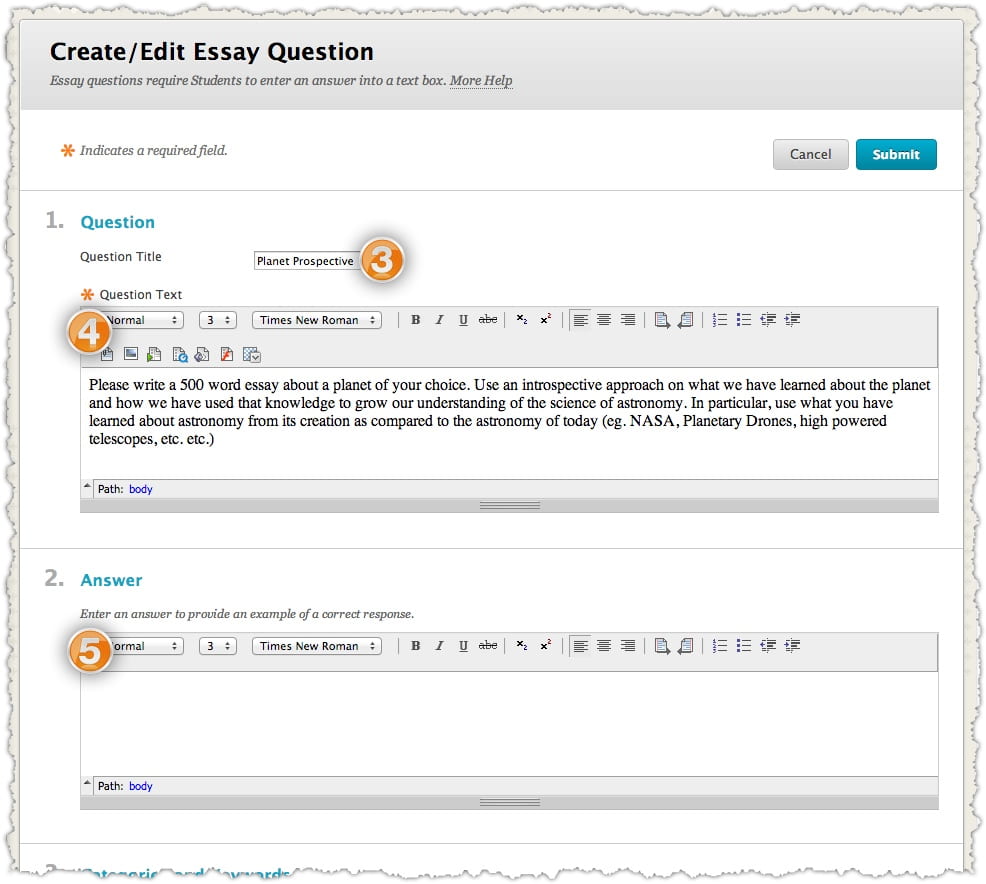
- Enter a Question Title.
- Enter the Essay Prompt
- You can choose to enter an example answer for the students to base their work off of.
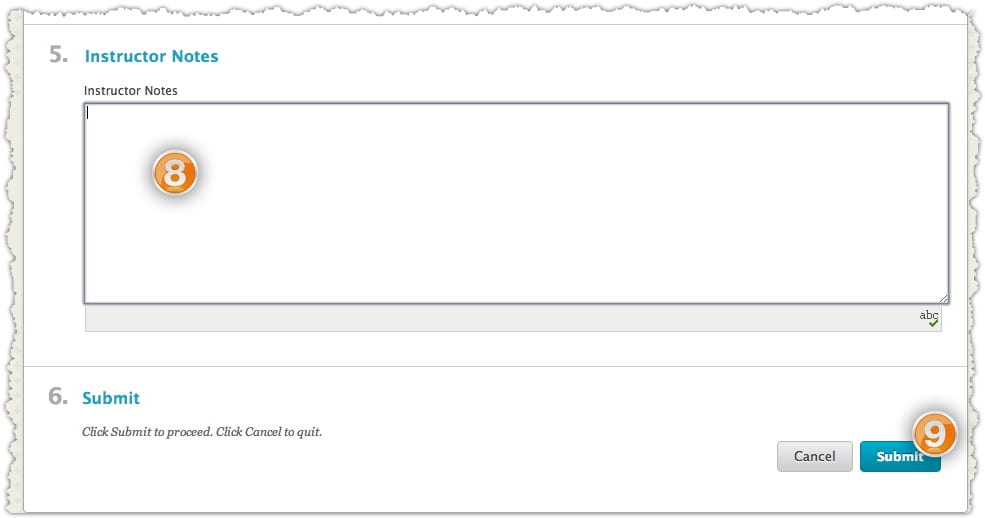
- You can choose to give the question a category, topics, a difficulty, and keywords for sorting later.
- You can leave instructor notes for yourself.
- Click Submit