Changing the Default Grading Schema (Movie 2:39)
NOTE: For optimal performance, use an up-to-date web browser and do not use Internet Explorer.
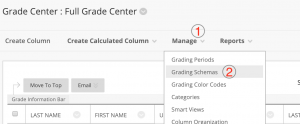
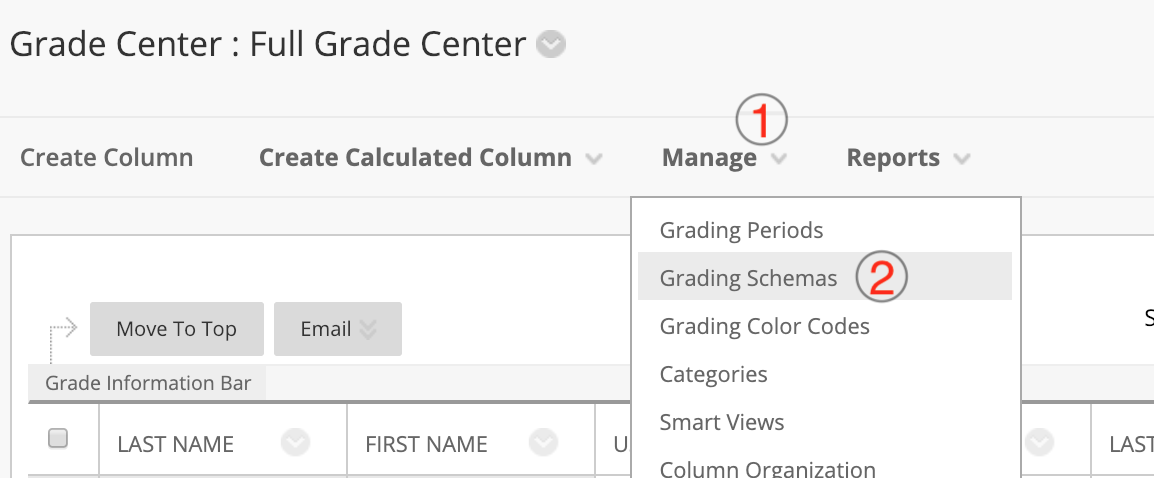
- In Grade Center, on the Action Bar click Manage to access the drop-down list.
- Select Grading Schemas.
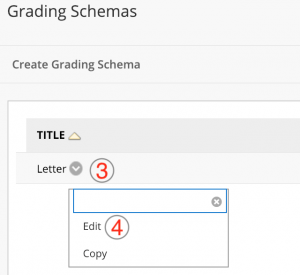
- On the Grading Schemas page, click the Letter Action Link to access the contextual menu.
- Select Edit.
- On the Edit Grading Schema page, edit the Name, if desired, and add an optional Description.

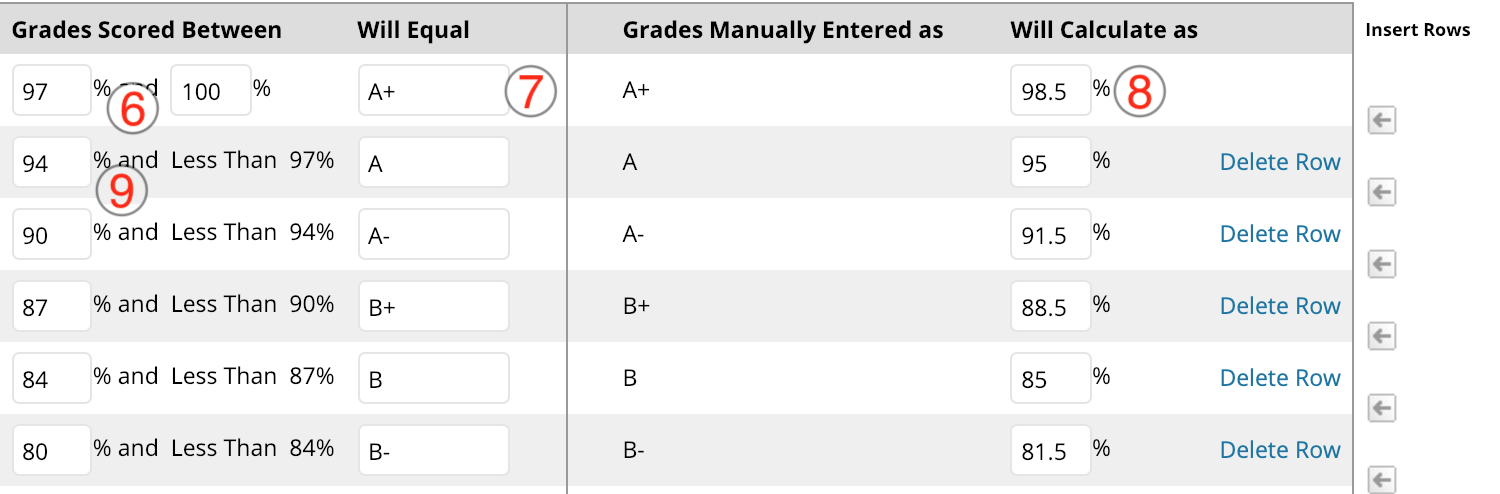
- In the Grades Scored Between text box, enter the percentage range for the letter grade.
- In the Will Equal text box, enter the letter grade.
NOTE: It is possible to use descriptive words like: Pass, Fail, Excellent, Average, Poor, etc., rather than letters. - In the Will Calculate as text box, enter the percentage value to be used if a letter grade is entered manually.

- Repeat steps for all letter grade values you want to edit.
- Click Submit.

The name you enter for the letter grade schema appears in the drop-down lists for Primary Display and Secondary Display when creating columns. The description is optional, but can help differentiate grading schemas.
NOTE: The value entered into the Will Calculate As cell must lay within the range entered into the Grades Scored Between on that row. If you fail to do this, you will receive an error when you attempt to save your work.
TIP: Start from the top and complete the values for the first letter grade and then move to the next row. Then, delete any letter grades not needed and insert additional rows as needed.